
Managing Projects on ShareCARD: A Step-by-Step Guide
Managing projects efficiently is essential for organizations that aim to meet their impact goals or revenue targets. To support this need, ShareCARD offers a powerful solution that simplifies project management. By providing a digital project file, it eliminates the need for physical documentation. At the same time, it enables seamless collaboration with both internal teams and external partners.
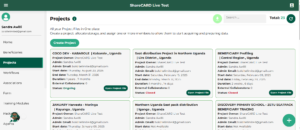
Step 1: Creating a New Project #
-
To begin, log in to your ShareCARD dashboard.
Once you’re logged in, navigate to the Projects section.
From there, click the plus (+) sign to create a new project.Next, fill out the required project details:
-
Project Name – Make sure it clearly reflects the project’s objective.
-
Timeline – Define the project’s start and end dates.
-
Project Description – Include:
-
The mission and vision of the project.
-
Specific impact goals and expected outcomes.
-
Key deliverables.
-
Additionally, you should:
-
Set the Target Reach – Define how many beneficiaries or stakeholders will be involved.
-
Specify the Project Location – Use the GPS tracking tool to pinpoint the area of implementation.
Finally, click Add Project to complete the setup.
Step 2: Managing Project Activities and Tasks #
After the project is created, open the Project File to begin organizing your activities.
Then, add structured tasks and key milestones to effectively track your progress.
Furthermore, monitor real-time status updates within the project dashboard to stay informed at all times.Step 3: Collaborating with External Partners #
-
-
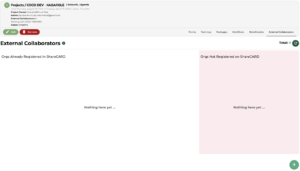
When it’s time to collaborate, go to the External Collaboration section of your dashboard.
Click the plus (+) sign to invite a new partner.Before sending the invite, make sure to define their role:
-
Funding Partner – Responsible for providing financial support.
-
Implementing Partner – Assists in the execution of the project.
Once the invite is sent, the collaborator will receive a project invitation.
After they accept, they can:-
Create or access forms, training modules, and resource inventory lists.
-
Add their own admins and field agents to support fieldwork.
-
Provide real-time updates on assessments and distributions.
-
Submit progress reports throughout the project, instead of waiting for completion.
Step 4: Creating Project Resources #
To keep your project organized, it’s important to set up necessary resources:
-
Forms – Navigate to the Forms section to create tools for data collection.
-
Packages – Create packages to track any received or distributed resources.
-
Training Modules – Build helpful content for field teams and beneficiaries.
By doing so, you’ll ensure that everyone involved is well-equipped to execute the project effectively.
Step 5: Assigning Tasks and Implementing Workflows #
Now that resources are ready, start assigning tasks to your team.
Be sure to align responsibilities with each team member’s role.
Additionally, create structured workflows that support timely execution.
This way, agents and field teams can stay focused and efficient throughout the project.Step 6: Monitoring and Evaluating Project Performance #
As your project progresses, you’ll need to track performance:
-
Track Task Submissions – All completed tasks are stored under the project folder.
-
Use Performance Analytics (coming soon) to:
-
Monitor execution progress.
-
Evaluate partner contributions.
-
Aggregate data for reports for your funders.
-
Coming soon: You can export Quick Reports for fast access to project summaries and impact data.
Step 7: Support and Feedback #
If you encounter any challenges or need additional help with the Projects feature, don’t hesitate to contact the ShareCARD Team.
We’re always here to assist and committed to making your project execution smooth and effective.Thank you for using ShareCARD to manage your projects with clarity, collaboration, and impact!
-


